eSIM Installation Guide
Follow these steps to activate your digital SIM card easily.
Tips Before Starting
Ensure these requirements are met for a successful and fast installation.

Stable WiFi Connection
You need a strong internet connection to download the eSIM profile successfully.
Compatible Device
Ensure your phone supports eSIM and is not network locked.
Sufficient Charge
Battery level above 20% is recommended during installation.
QR Code Ready
Have your eSIM QR code from the confirmation email ready.
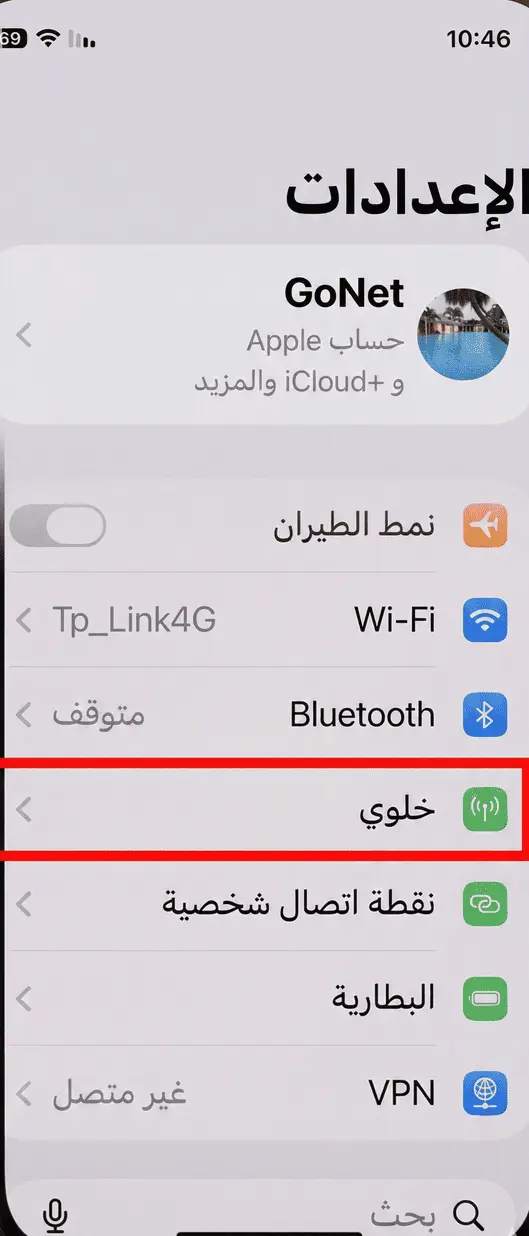
Step 1: Go to "Cellular"
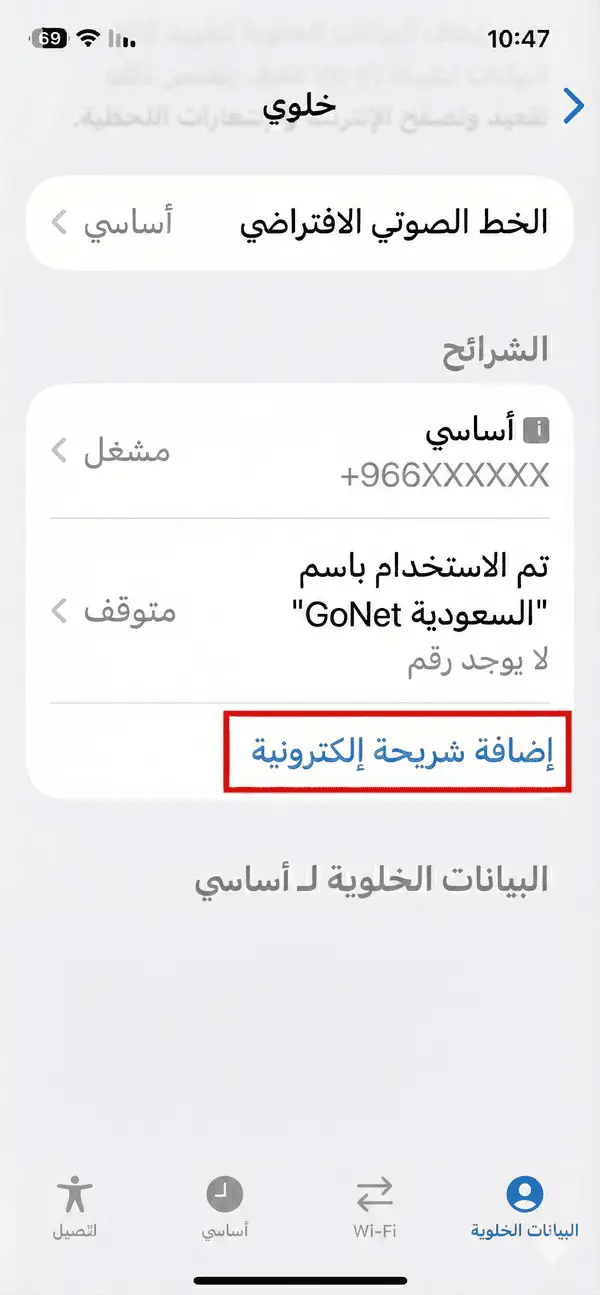
Step 2: Select "Add eSIM"
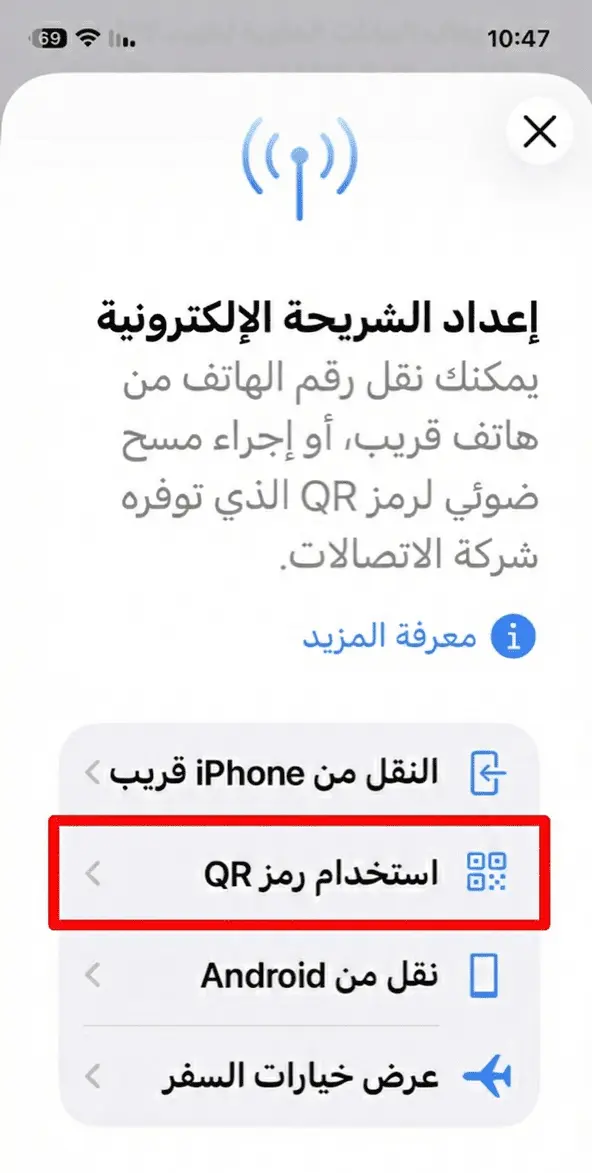
Step 3: Select "Use QR Code"
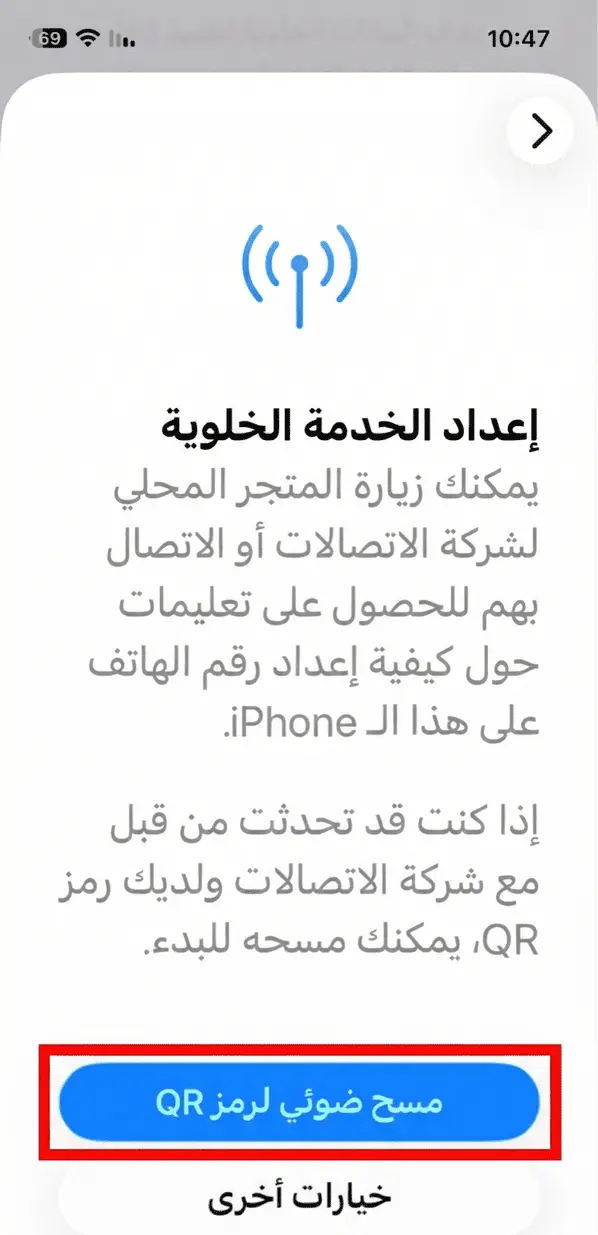
Step 4: Scan your QR code
Step 5: After scanning, return to Cellular > Select new SIM and match the settings shown
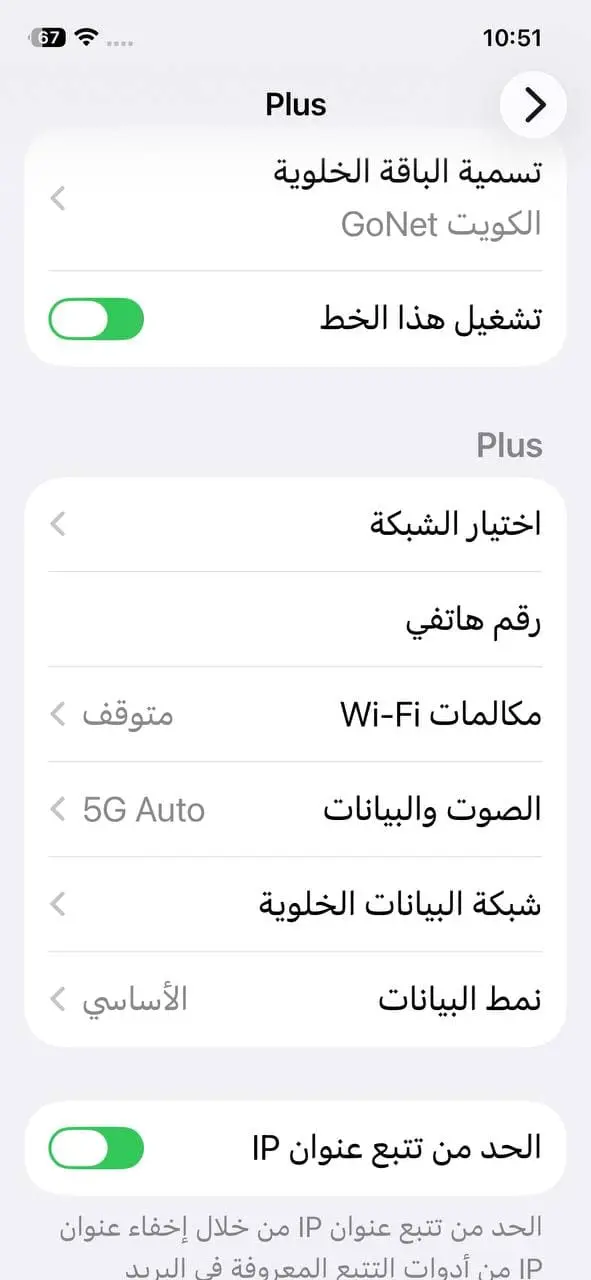
Step 6: If you choose manual entry

Step 7: Tap "Turn On This Line" (You may need to exit and re-enter for full settings)
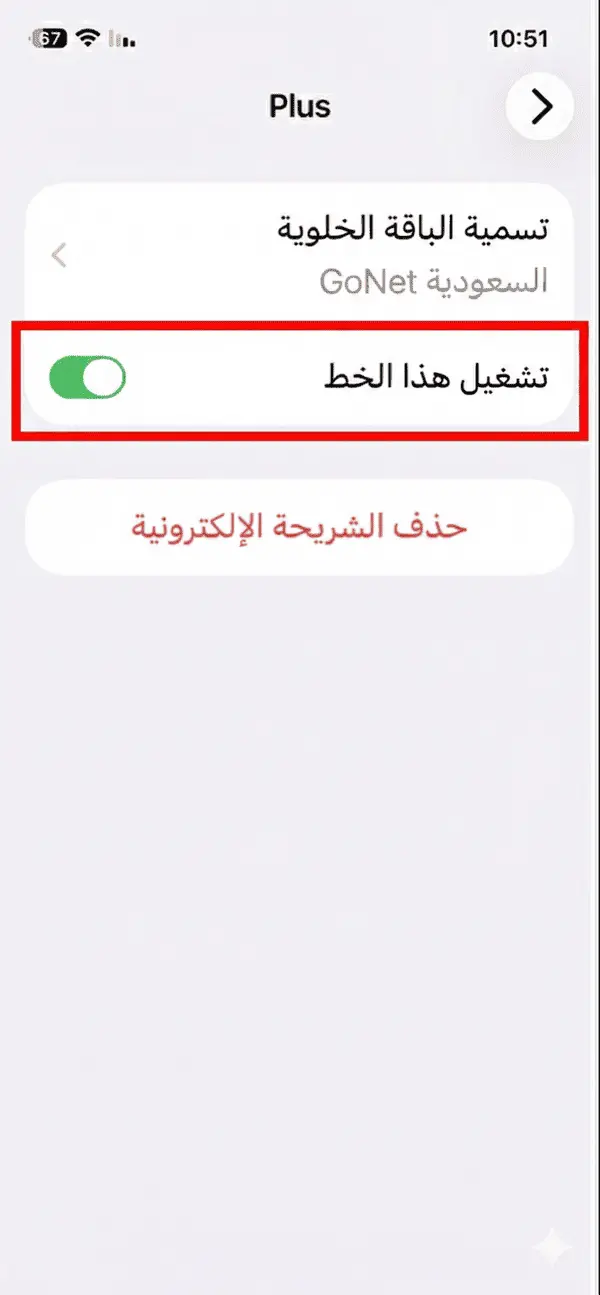
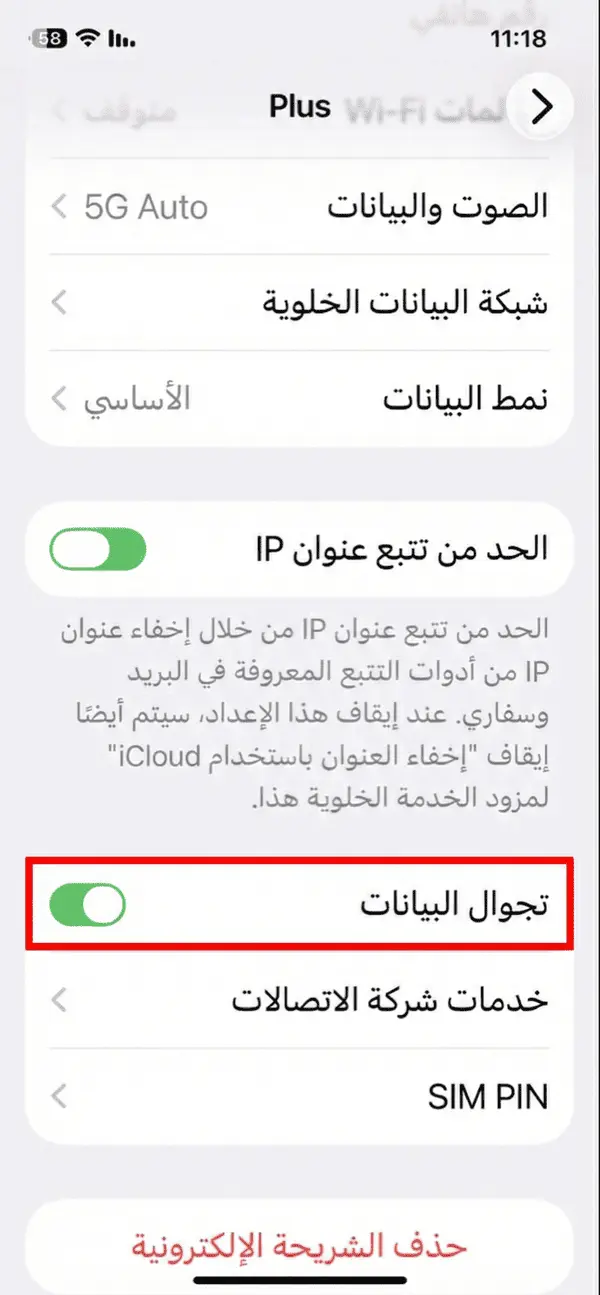
Step 8: Match the settings shown and don't forget to enable "Data Roaming"
Frequently Asked Questions About eSIM Installation
Is eSIM installation easy?
Yes. In most cases, installation takes only a few minutes by following the settings steps, adding eSIM, and scanning the QR code.
How do I receive the installation link and QR code?
After purchase, GoNet automatically sends a direct installation link and your eSIM QR code to your registered email.
Should I install eSIM before traveling or after arrival?
It's recommended to install before traveling using WiFi, then activate it for data after arrival with Data Roaming enabled.
What should I do if eSIM doesn't work after installation?
Make sure eSIM is selected as the default data line, enable Data Roaming, then restart your device. If the issue continues, contact support.